Before using the Ticket Scanner in Dock Access always make sure that the scanner settings are set up correctly at the beginning of the shift. Use the following steps to check the recommenced settings.
-
Log into Anchor Dock Access
-
Go to the main menu on the left
-
Click on Settings
-
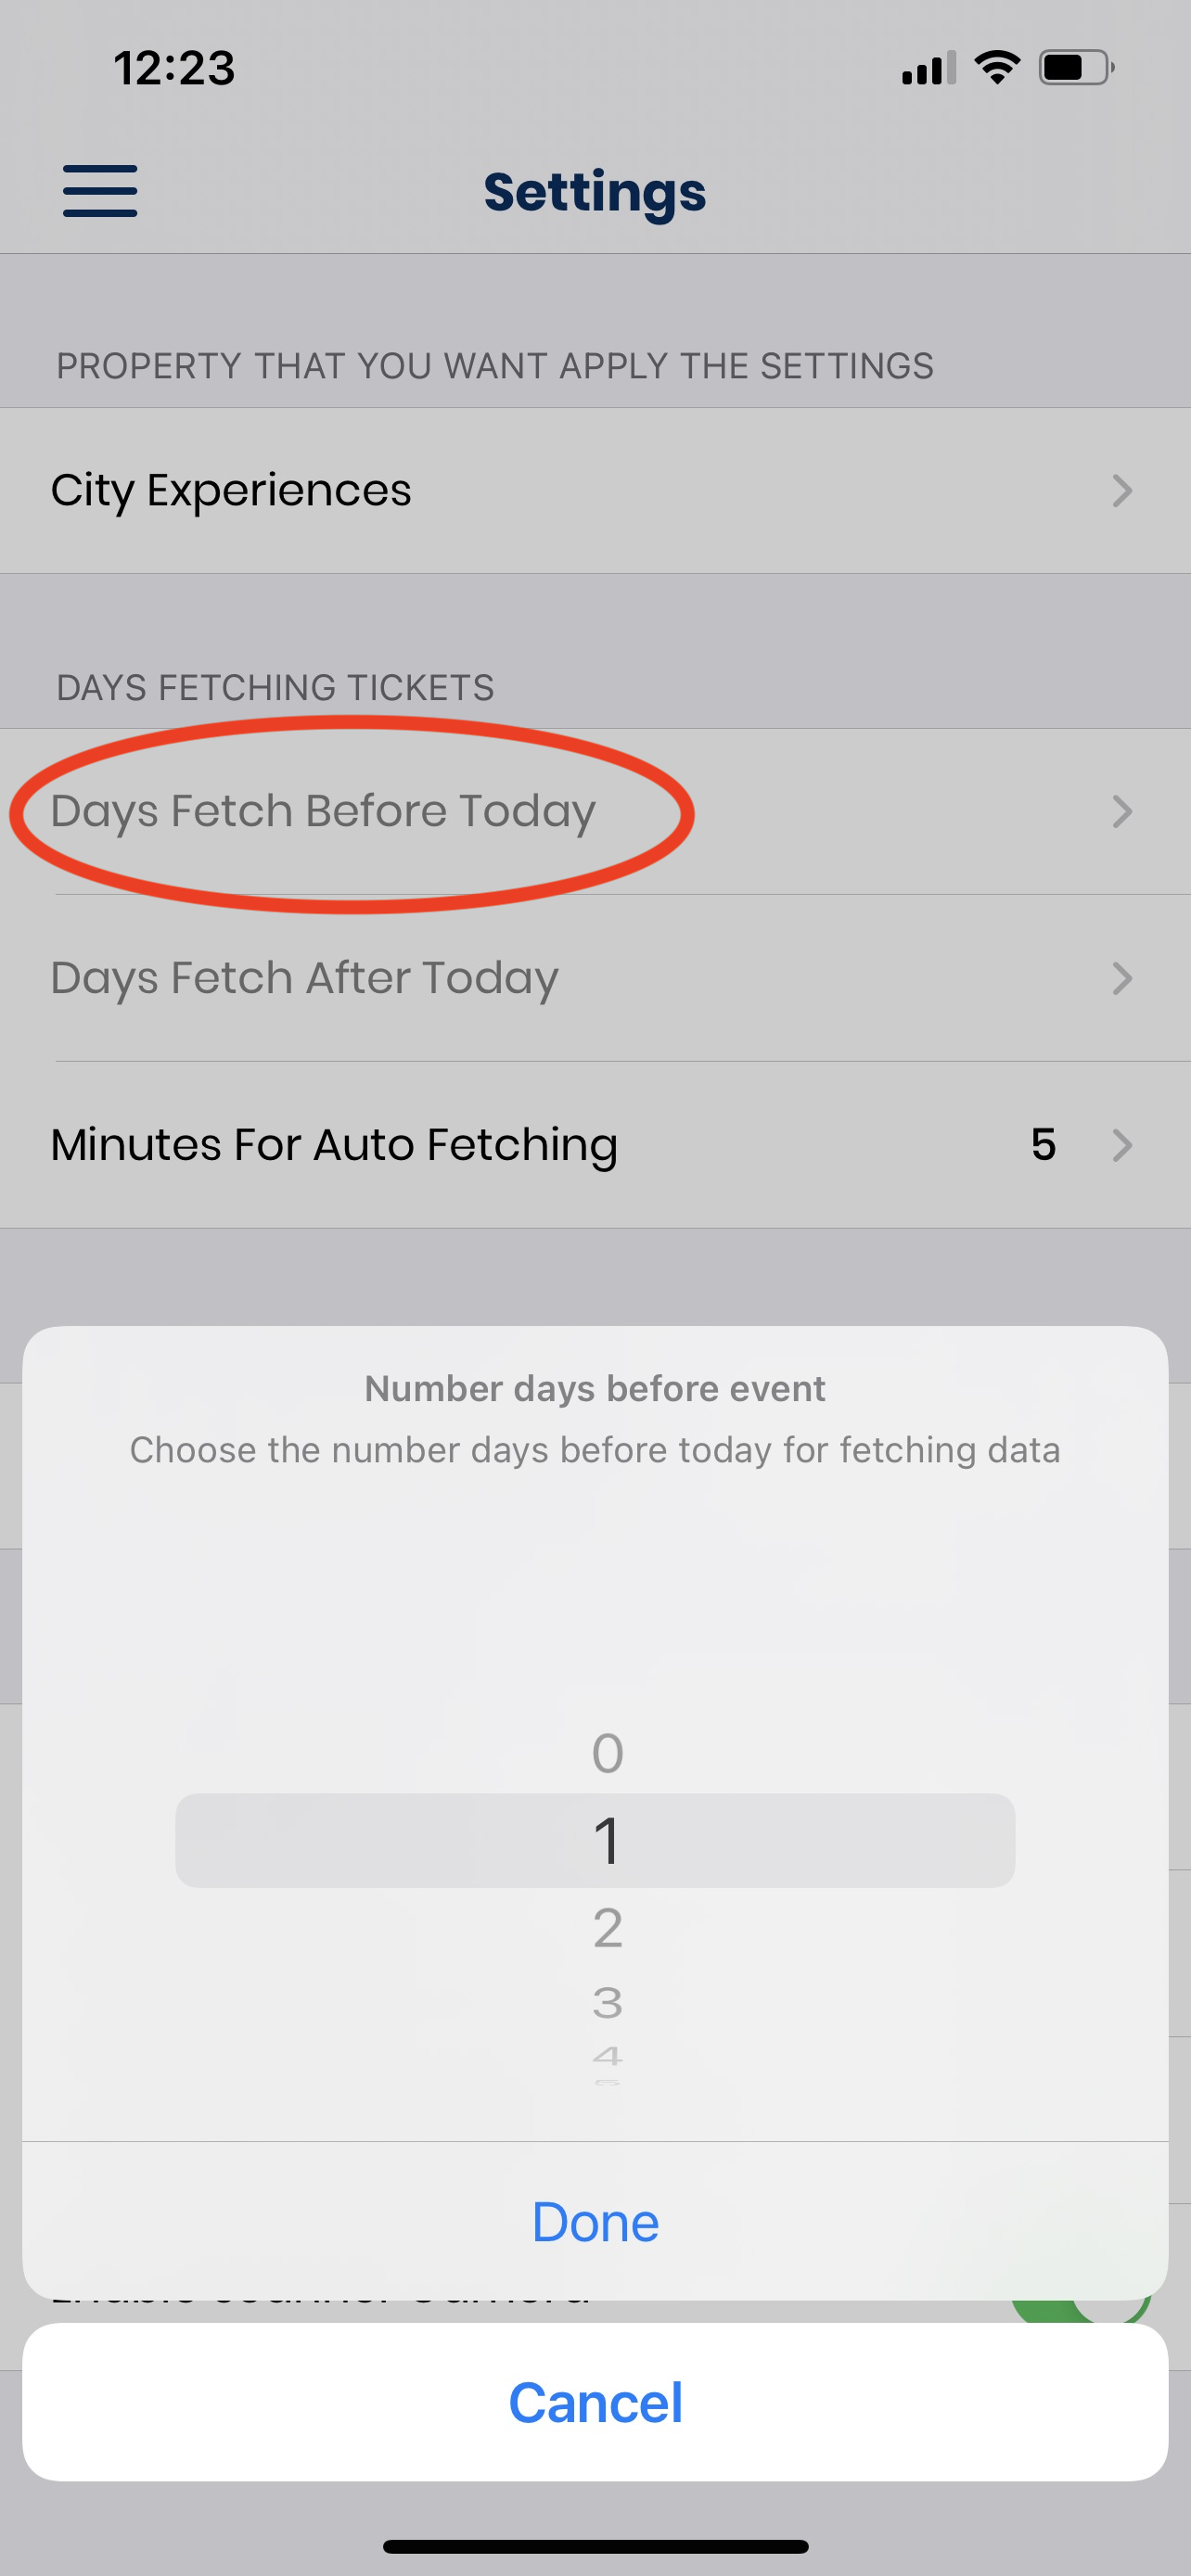
Click on Days Fetch Before Today and select 1 in the drop-down and click DONE.
-
Click on Days Fetch After Today and select 1 in the drop-down and click DONE.
-
Click on Minutes For Auto Fetching and select 5 in the drop-down and click DONE.
-
Sync Tickets Across All Devices should be ON
-
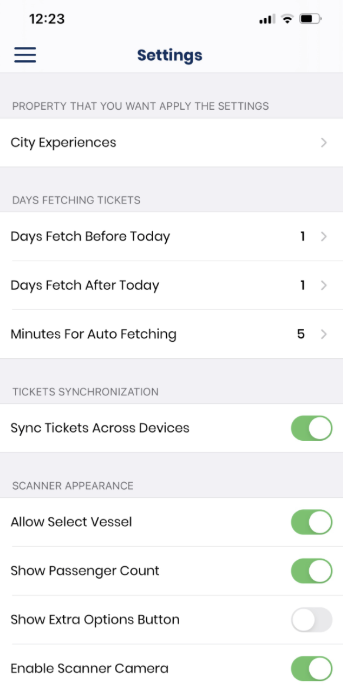
Go to the Scanner Appearance Menu on the same page and switch ON the following;
-
Allow Select Vessel
-
Show Passenger Count
-
Enable Scanner Camera
-
When you are done, the Settings Screen should look like this.