Use the following steps to create your Private Group/Charter Agreement in Anchor
-
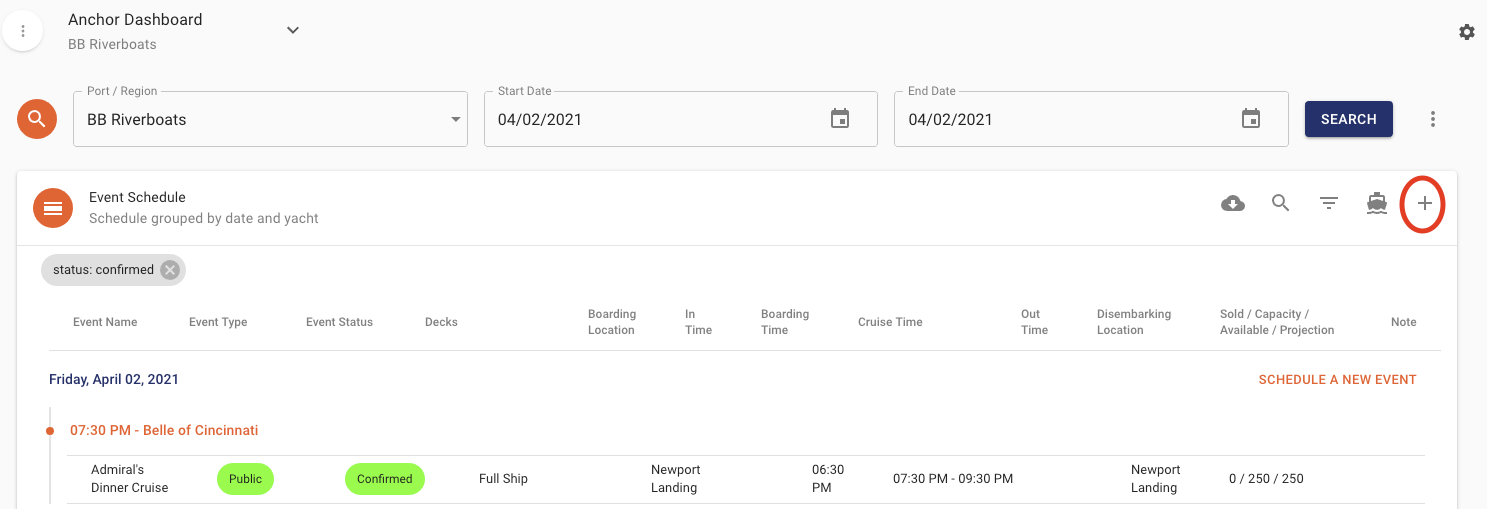
Go to the Event Schedule in the left side bar
-
Click on the + sign on the right side of the screen to start.
-
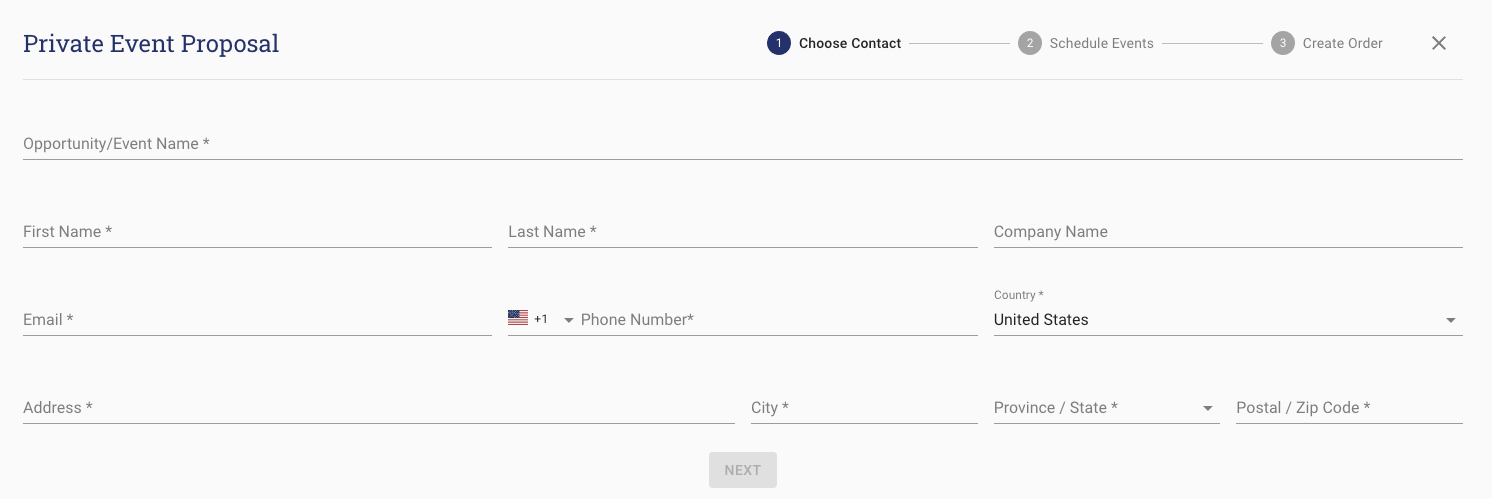
This will open to the Private Event Proposal Screen where you will fill out all the details. Note that the Opportunity/Event Name is what you will see as the title on your Quote or Agreement that you send to the client.
-
Click NEXT to continue.
-
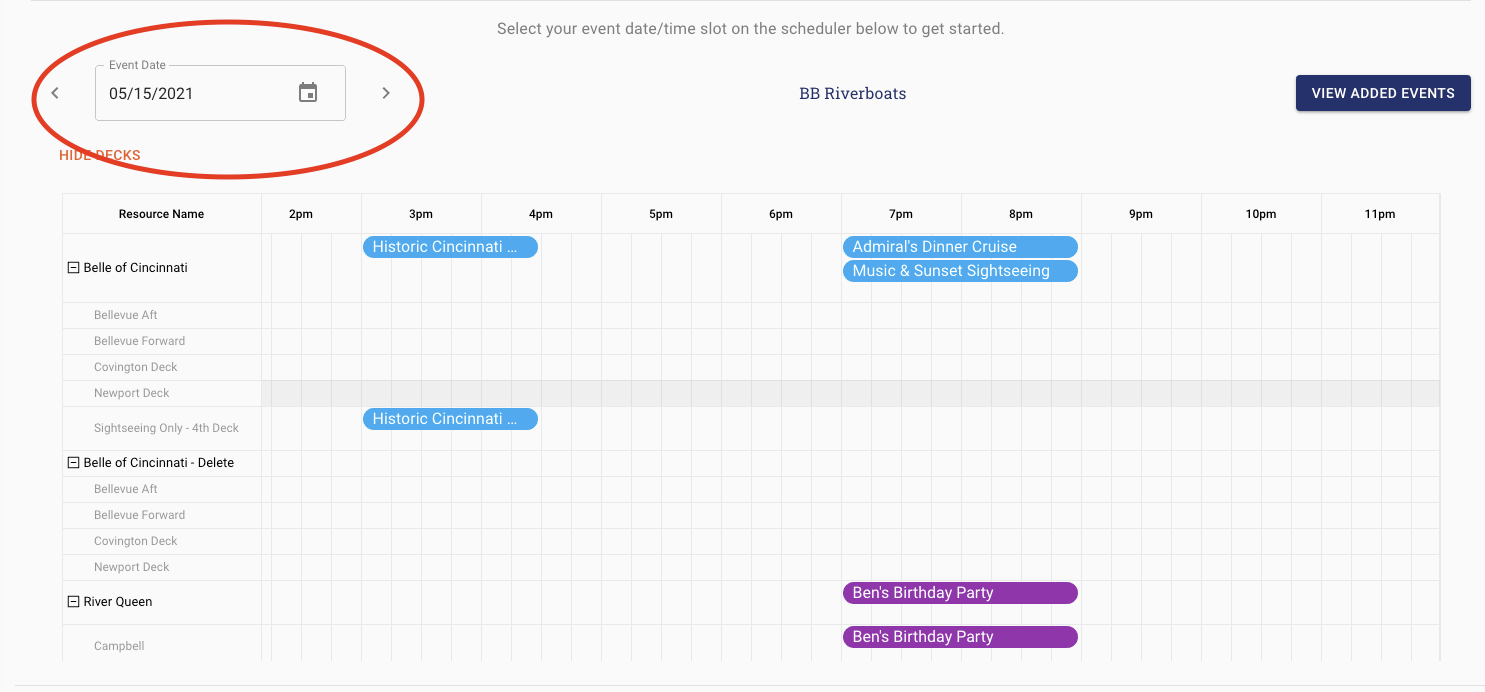
Select the Event Date in the calendar.
-
Find the Vessel or Deck that you want to book and make sure that the time is available.
-
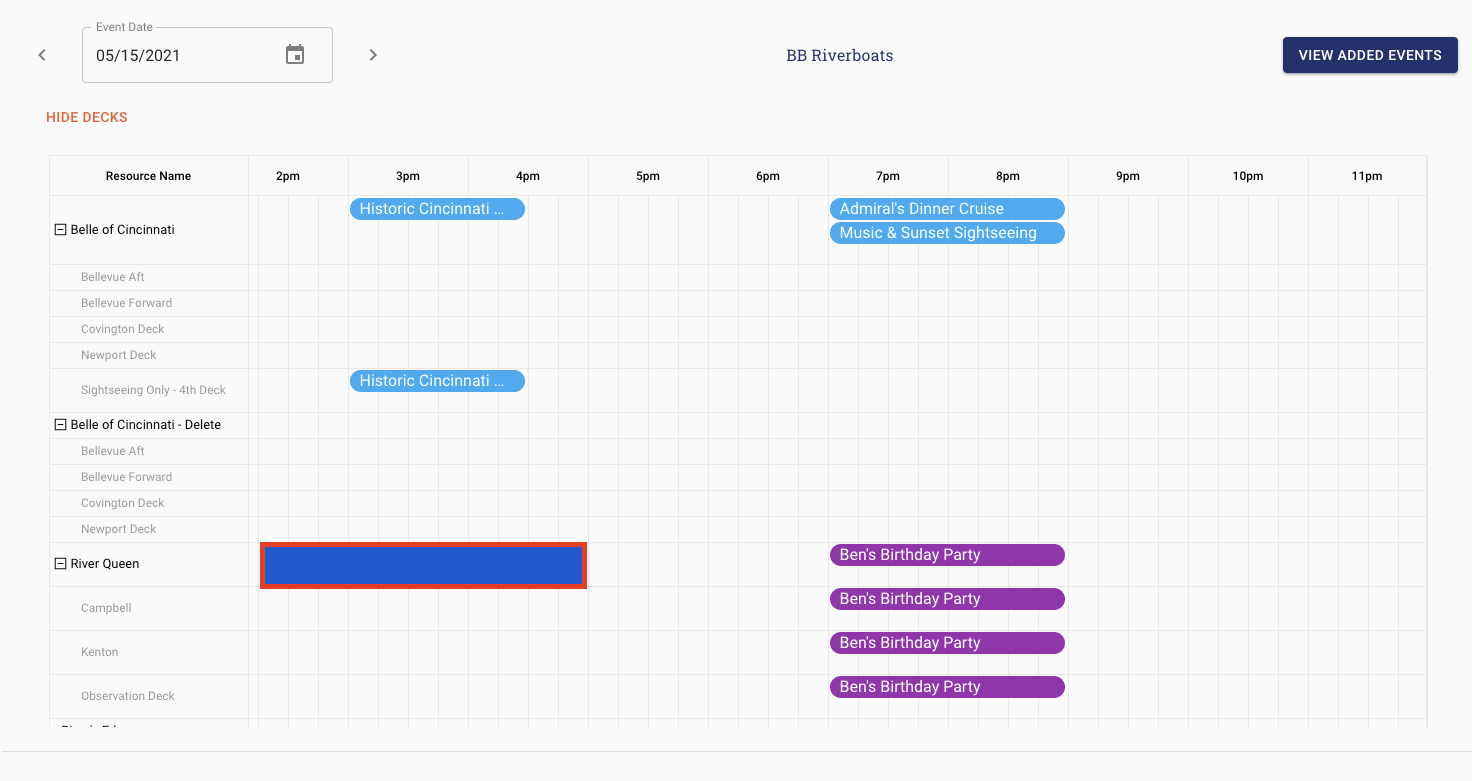
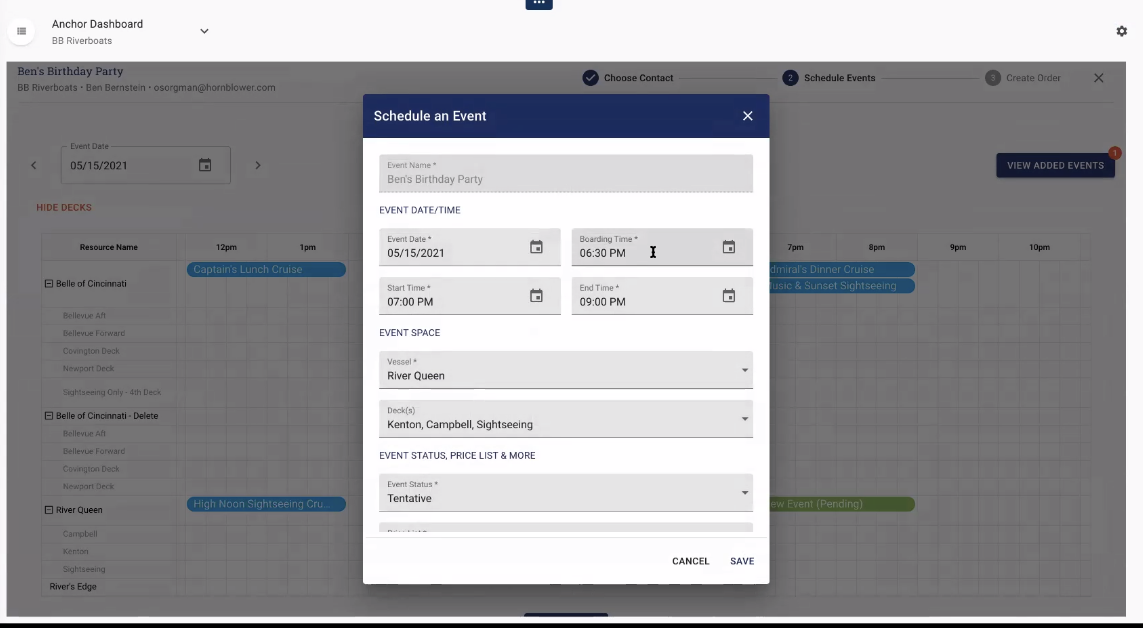
To book the Deck or Full Vessel, click on the cell that corresponds to the start time for your event and the Deck/Vessel that you want to book and highlight the cells until the cell that corresponds to the end time. See the example below.
-
Schedule an Event Screen will automatically appear on your screen. Update the date and time fields as needed.
-
Check the Event Space is correct and update as needed.
-
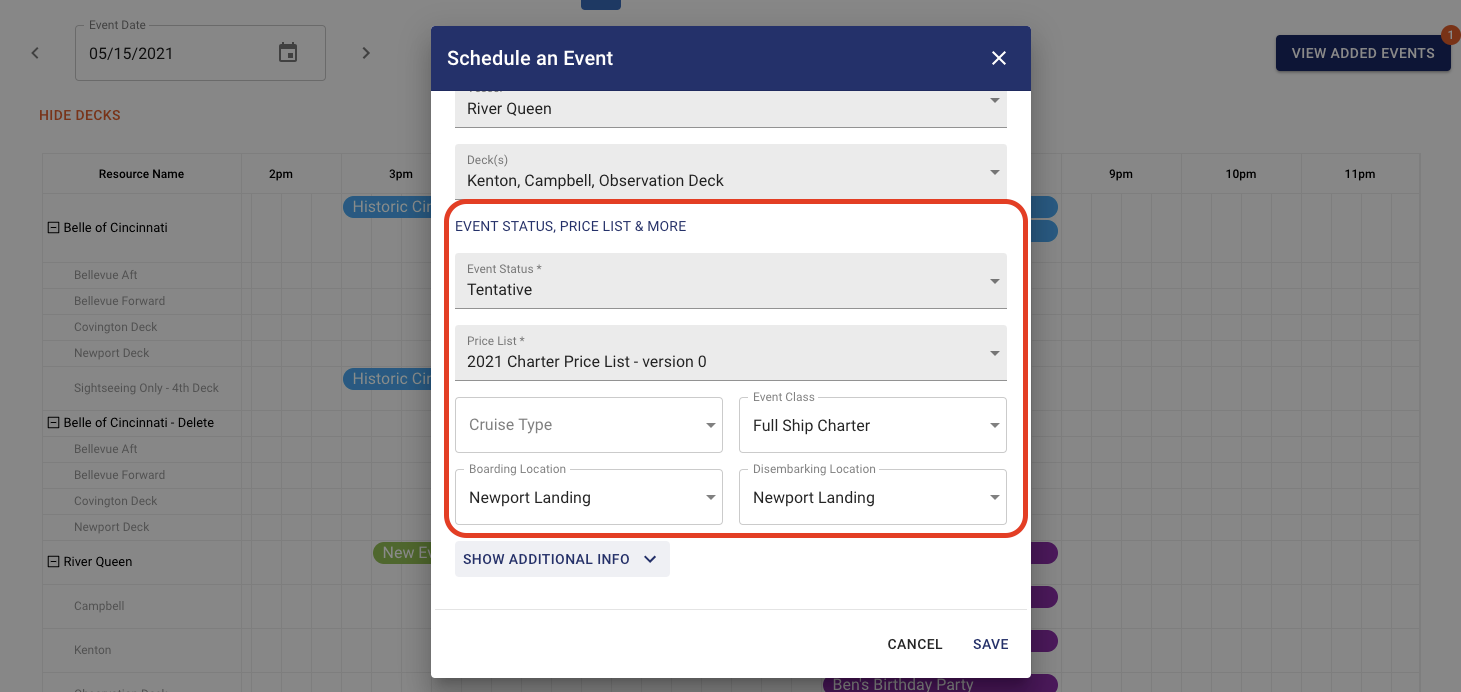
Update the Event Status
-
Tentative status will hold the space for the event
-
Quote status will NOT hold the space for the event, it will simply give the quote to the client for review. If they do want to book the event, then you would just go back into the booking and update the status within the booking to TENTATIVE, and then send out the agreement for signature and payment.
-
Option 2, 3, 4 are used for agreements that are like a ‘waitlist’ for events that want to book on a date that already has a Tentative event status on the same vessel and time. If the Tentative booking does not book, then you can switch the Option 2 status to Tentative Status, or confirmed to make it the primary booking holding that time slot.
-

-
Update the Price List
-
Update the Event Class, Boarding Location, Disembarking Location as needed.
-
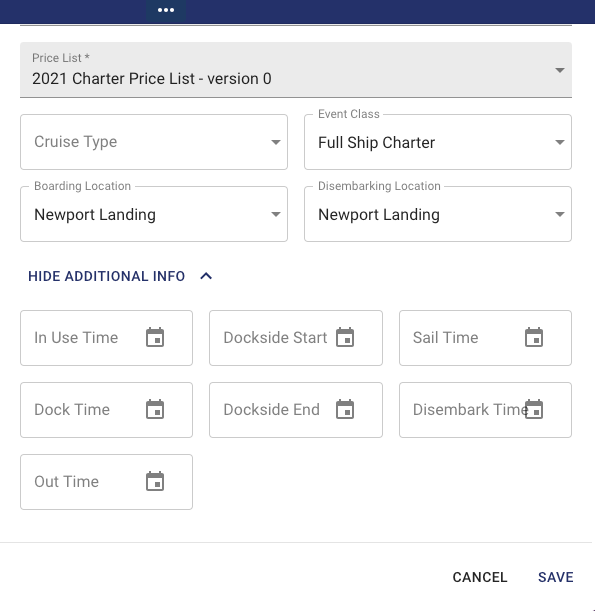
Open the ADDITIONAL INFO if your event requires you to include these fields in the original agreement. You can send an agreenmne
-
IN USE TIME – Time that the vessel/deck will be used by the client or the setup crew/
-
Dockside Start – Time that the guests will be starting their event prior to cruising.
-
Sail Time – Time that the cruise will start sailing
-
Dock Time – D
-
Dockside End – Time that the guests need to depart the dock.
-
Disembark Time – Time that the guests need to depart the dock.
-
Out Time
-
-
Click SAVE when you are done.
-
If you want to add another event date select Add More Events. Once you have added any additional dates select Continue.
-
Follow the same steps to build out another event

-
Click CONTINUE when you are ready to create the agreement or quote.
-
Click CREATE ORDER and it will take you to the ‘build and order screen’.

-
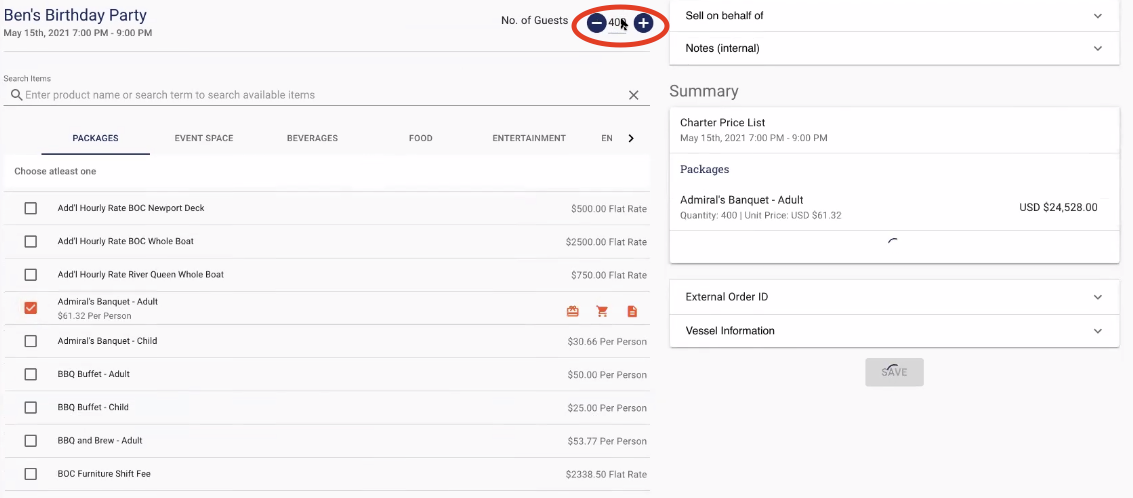
Enter the number of guests expected at the event at the top next to No. of Guests.
-
Add Items to your order by simply clicking on the checkbox next to each item. You will notice the summary on the right side start to fill up with items.
-
You can find items but clicking the sections Packages, Event Space, Beverages, etc.. you can also use the Search Items section
-
Under the Details Tab you can:
-
Enter the Guest Demographic this should be an overview of the type of an event that is going to occur and who will be attending.
-
Enter the Timeline of events
-
Enter notes for Setup
-
Choose any non revenue line items that need to be added to your contract
-
-
-
-
Items which are per person will automatically calculate the cost for the number of guests attending. If you need to adjust the number you can do this by selecting the Shopping Cart and updating the amount.
-
Modify the description by clicking on Note Icon.
-
For line items that have pricing that can be adjusted or names that can be changed click on the $ symbol.
-
If you have any notes for a specific section you can enter those at the bottom of each section.
-
Note that they will show up on the contract.
-
-
You can also use the Search Items section to find the items by name.
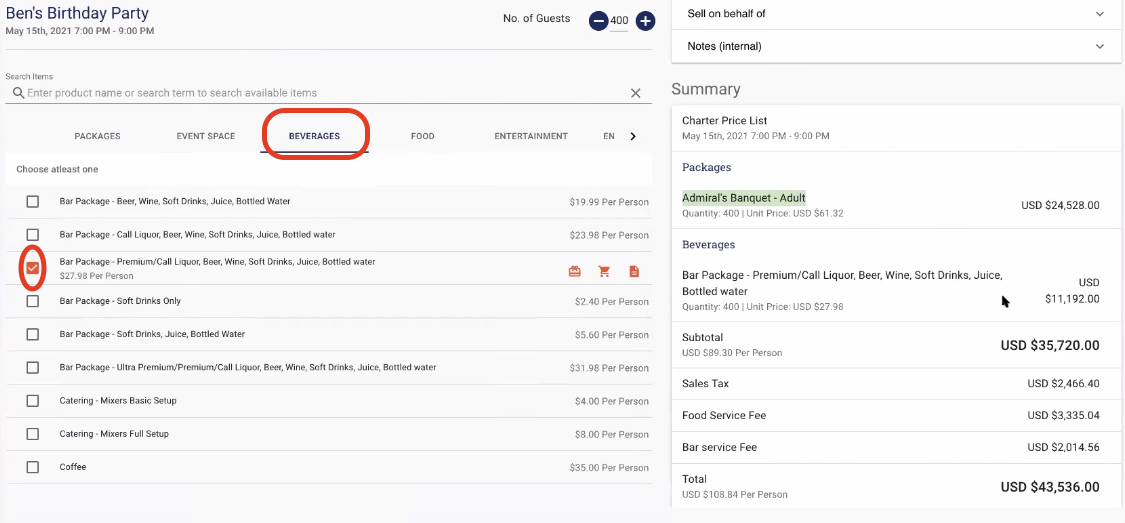
Once you have added all your items select Save.
NOTE: If you update the total number of guests in a proposal after you created it, anything with a per person rate that you modified the default count on, will not automatically update when you adjust your guest count. Anything that was not modified will update accordingly.
For example, if you have 100 guests and you set up a Bar Package for 90 adults and Soft drink Package for 10 children, and then you update your guest count to 105, you will need to update these two package counts again to recalculate.
Generate a Quote or Agreement
-
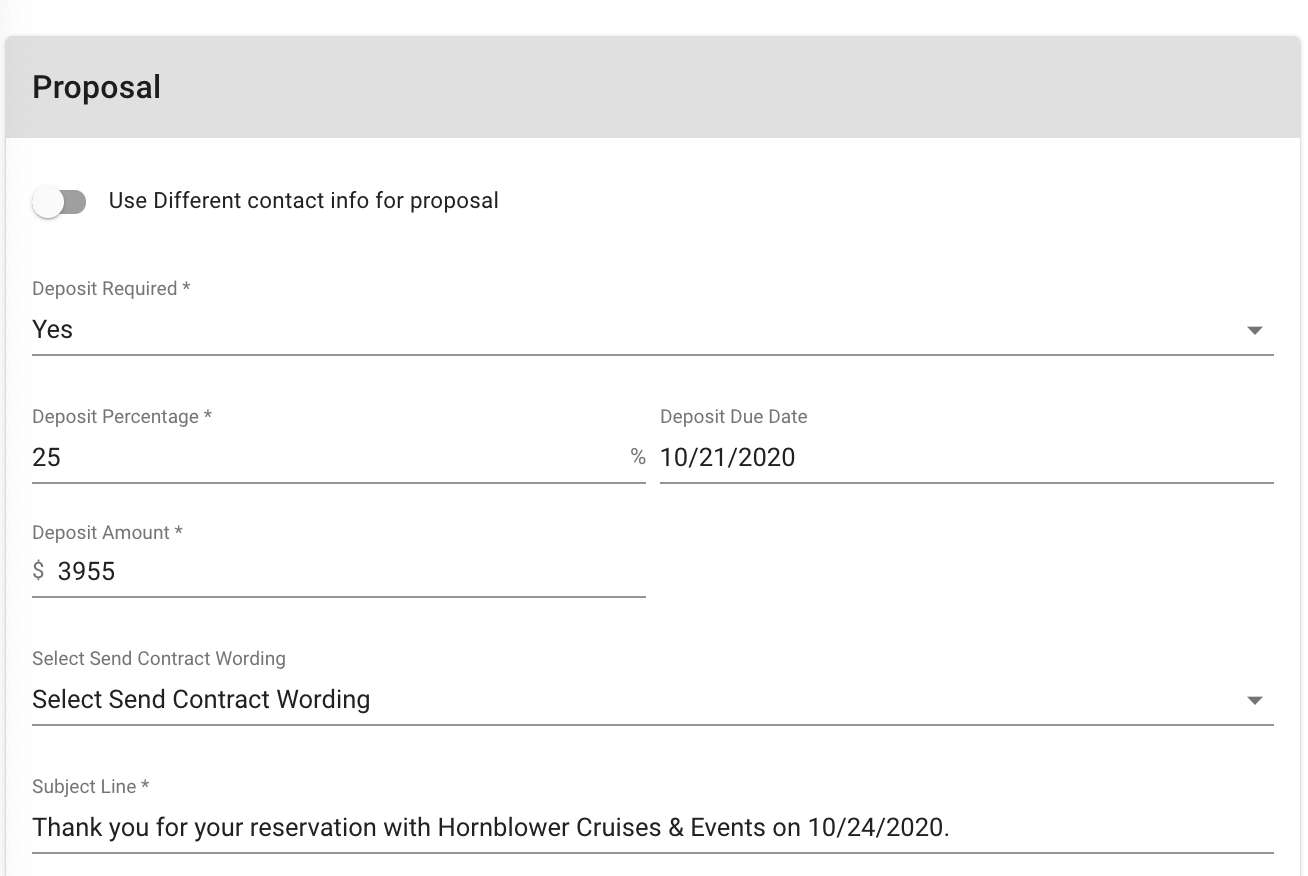
Determine if a Deposit is required or not. If you are sending a quote it is not needed, if you are sending an agreement it will be needed.
-
Determine percentage amount and deposit due date
-
Select your type of Contract Wording from the drop down
-
Determine which terms and conditions relate to your type of order
-
Select Send Proposal to Client for Signature
-
Determine if you are sending a quick quote or an agreement.
-
Note a Quick Quote will not hold seats.
-
-
Click Save. The Quote or Agreement will automatically send to your guest.
-
When the guest has signed the Agreement, it will automatically appear in the files section of their Service Booking page. If you need a print a copy you can simply click download and print out the PDF file.
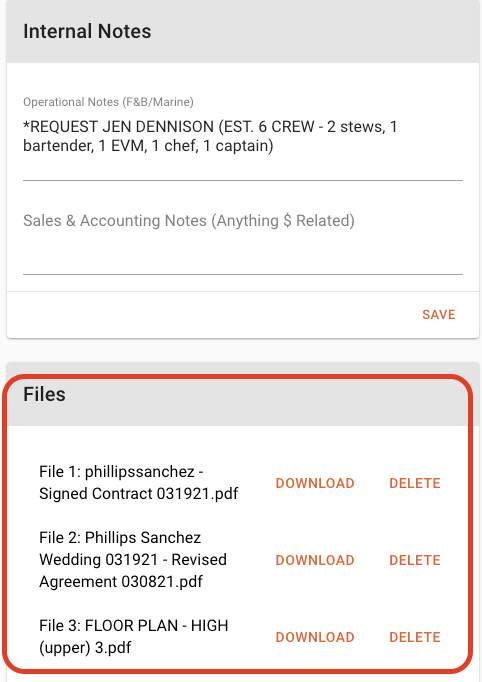
-
If you have Floor Plans or other important files to upload for F& B Team to reference, you can upload these files manually to the F&B/Ops Files Section on the Service Booking Page.
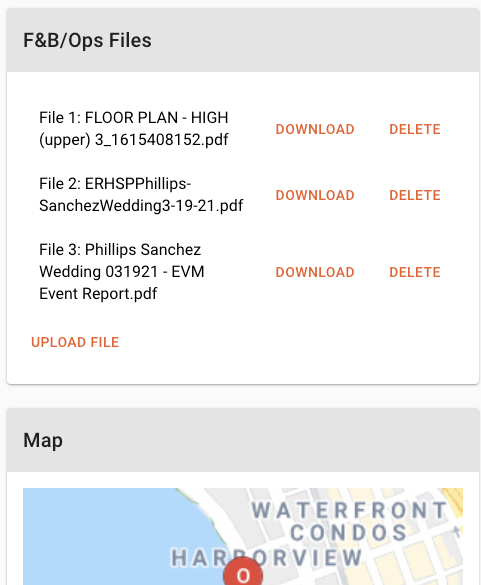
These files will automatically link to the Cruise Details Report under the related event. This is very helpful for Catering Meetings. You will not have to go back to the booking to retrieve the files, you can simply click on the link, download and print as needed.
